Tech Tips
How To Take Screenshot On Windows 11

How To Take Screenshot On Windows 11
Capturing an image of your screen is super useful for smartphone, PC, and tablet users, and even if some believe there is really no need for the feature, most PC owners still use it from time to time. As you already know, Microsoft’s operating system is known to have several options for snapping images from your computer’s screen, and Windows 11 is no different.
In this article, we’ll break down several methods for screen capturing, including the good old keyboard shortcuts and modern tools that allow you to set timers for the screenshots, and even edit and share them. See How To Take A Screenshot On Windows 11.
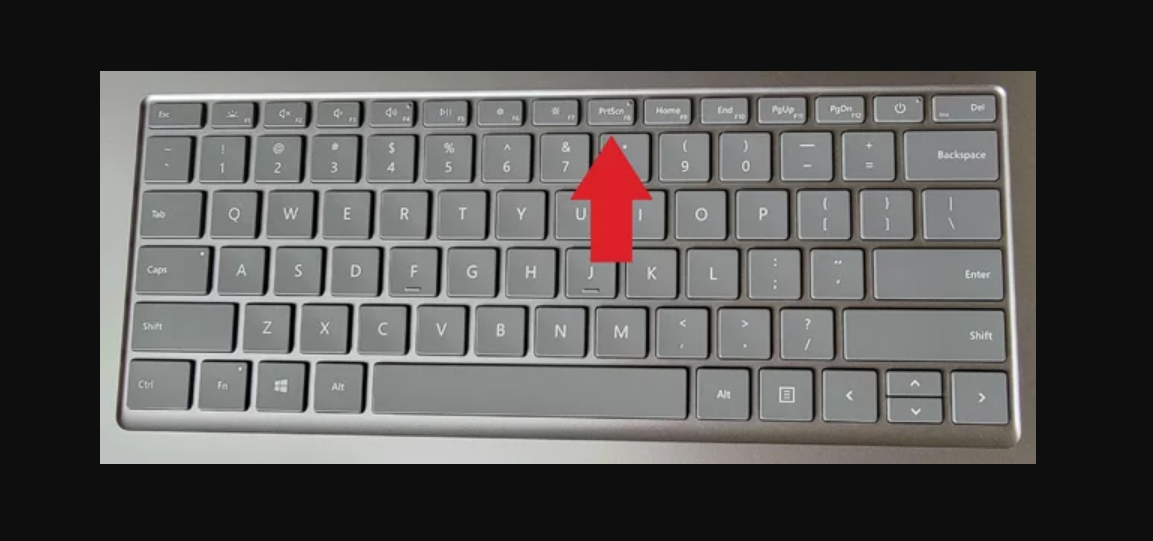
1. Use The PrtSc (Print Screen) Key And Paste:

PrtSc (Print Screen) Key And Paste – Windows Screenshot Button
As you must already know, you can simply capture a screenshot with the press of the PrtSC key. Specific keyboards name it “Print Screen” and you just have to press this key to copy the full desktop image to the clipboard.
After that, users can paste the image into any application that accepts pasted images like Paint, Paint 3D, or Adobe Photoshop.
If you only want to capture the presently active app window, add the Alt key, i.e Alt-PrtSc. Like the full capture explained above, using this key combination will save the present window to the clipboard, and from there, you can paste it into an imaging app.
How To Take Screenshot On Windows
2. Use The PrtSc Key With OneDrive:
PrtSc can also be combined with OneDrive if you want to set it up to automatically create an image file of your screenshot in OneDrive. This one is different from the standard PrtSc option because the result is very different, and it will save you the added stress of launching an application and pasting it from the clipboard. Set it up by adhering to these instructions:
- Head into OneDrive’s settings from the cloud icon on the right side of the taskbar. Select the Backup tab of the OneDrive utility’s Settings dialog and ensure “Automatically Save Screenshots.” is ticked.
That tick will change how PrtSc works completely, users will no longer need to launch an image application or paste from the clipboard. Rather, an image file gets automatically created in the OneDrive folder of your choice. It can be accessed from any device where OneDrive can be launched and it is useful for those who prefer to use the screenshot as an image file, instead of just pasting it somewhere.
See Also: Top Windows Shortcut Keys For Users
3. Use The Windows Key-PrtSc Keyboard Shortcut:
You can also use Windows Key-PrtSc to capture screenshots and automatically paste them somewhere, other than OneDrive. By so doing, your screen will dim briefly and the image file will immediately be stored in the Pictures > Screenshots folder. This is a method everyone is familiar with because it is quite straightforward.
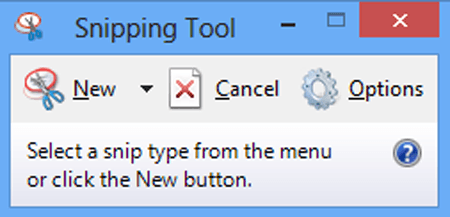
4. Use the Snipping Tool:

Windows Snipping Tool – How To Take Screenshot On Windows
This Windows 11 tool is simply Windows combining the earlier Snipping Tool with Windows 10’s terrific Snip & Sketch tool, and the simplest way to access it is by pressing Windows Key-Shift-S. That keyboard shortcut allows you to capture a screenshot using a rectangular selection, freehand selection, full window, or full-screen capture.
For the first 2 options, simply draw with the cursor to choose the area you wish to screenshot. For the second 2 choices, you only have to click.
As you release the cursor, a notification will be visible in the lower-right-hand corner showing a thumbnail image of the screenshot. Tap on the image below to launch the Snipping Tool interface.
See Also: Simple Tweaks To Speed Up Windows 10
Here, you will be able to mark up the screenshot with a pen or highlighter or crop it. You can also use a ruler to draw straight lines, and the finger button allows you to draw on a touch screen.
How To Take Screenshot On Windows

Windows Screenshot – How To Take Screenshot On Windows
You will also be able to save the screenshot and any edits using the 3.5-inch floppy disk icon and its Share button will allow you to send the image using Windows 11’s standard share panel. Users will even be able to print the image or open it in a different application.
To use a timer before capturing the screen, just type Snipping in the Start menu and open the program window, instead of using the keyboard shortcut.
Thanks for reading How To Take A Screenshot On Windows 11. You can click to read more Articles.
Don’t Forget To Like, Comment, and Share with your friends.


