Popular
How to Install a Smart Light Bulb

How to Install a Smart Light Bulb: A Step-by-Step Guide
Introduction:
Smart light bulbs have become an essential part of modern home automation. With their ability to be controlled remotely and customized to fit your preferences, they offer a convenient and energy-efficient way to light up your living spaces. In this article, we’ll take you through the installation process of a smart light bulb, step by step, ensuring that you can enjoy the benefits of this innovative technology with ease.
Step 1: Gather Necessary Tools and Materials
Before you begin the installation of your smart light bulb, it’s essential to have the right tools and materials at your disposal. Here’s what you’ll need:
Tools:
- Screwdriver (if required for your light fixture)
- Smartphone or tablet
- Wi-Fi network and password
Materials:
- Smart light bulb
- Compatible light fixture
- Manufacturer’s installation guide
Having these items on hand will make the installation process smoother and more efficient.
Step 2: Choose the Right Smart Light Bulb
Choosing the appropriate smart light bulb is a critical step in the installation process. There are various types of smart bulbs available, each offering different features. Consider the following factors when making your selection:
1. Bulb Type:
- White Smart Bulbs: Provide adjustable white light, ideal for general illumination.
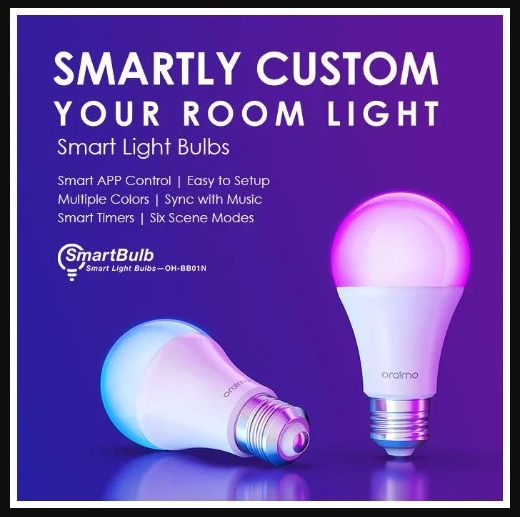
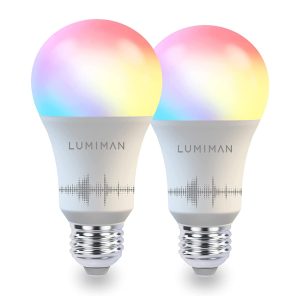
- Color-Changing Bulbs: This allows you to choose from a wide spectrum of colors, making it perfect for setting moods.
- Dimmable Bulbs: Offer adjustable brightness levels for versatility.
2. Compatibility:
- Ensure that the smart bulb you choose is compatible with your existing light fixtures and home automation system. Check the manufacturer’s specifications for details.
3. Smart Assistant Integration:
- If you use voice assistants like Alexa or Google Assistant, make sure the smart bulb can be integrated with your preferred system.
By selecting the right smart bulb, you can tailor your lighting to match your needs and preferences.
Step 3: Install the Compatible Smartphone App
Most smart light bulbs come with their dedicated smartphone apps for control. To prepare for the installation, follow these steps:
a. Download the App:
- Visit your device’s app store (e.g., Apple App Store or Google Play Store) and search for the app associated with your smart bulb brand. Download and install it on your smartphone or tablet.
b. Account Setup:
- Open the app and follow the on-screen instructions to create an account or log in. This account is usually necessary to link your smart bulb to the app.
c. App Compatibility:
- Ensure that your smartphone or tablet is compatible with the app. The app should work seamlessly with your device’s operating system.
d. Network Connection:
- Connect your smartphone or tablet to the same Wi-Fi network you plan to use with your smart bulb.
By installing the app and preparing your device, you’re ready to move forward with the physical installation of your smart light bulb.
With these initial steps completed, you’re well on your way to enjoying the benefits of a smart light bulb. In the upcoming sections of this article, we’ll guide you through the practical installation process, troubleshoot common issues, and provide tips for optimizing your smart lighting experience.
Let’s illuminate the path to a brighter and more intelligent home.
Step 4: Safety Precautions
Safety should always be a top priority when working with electrical components. Before you proceed with the installation, take the following safety precautions:
a. Turn Off the Power:
- Head to your home’s electrical panel and switch off the power to the light fixture you’ll be working on. This ensures you won’t risk electrical shocks during the installation.
b. Use Appropriate Safety Gear:
- Although smart light bulb installation is relatively low-risk, it’s advisable to wear safety gear such as gloves and safety glasses to protect yourself.
By following these precautions, you can ensure a safe and incident-free installation process.
Step 5: Installation Steps
Now that you’ve completed the necessary preparatory steps, it’s time to proceed with the installation of your smart light bulb. Follow these steps:
a. Remove the Old Light Bulb:
- If there’s an existing light bulb in your fixture, carefully unscrew it and remove it. Place it in a safe location, as you may want to use it later.
b. Install the Smart Light Bulb:
- Screw the smart light bulb into the fixture. Ensure it’s securely in place, but avoid over-tightening, which can damage the bulb or the fixture.
c. Power on the Light Fixture:
- With the smart bulb in place, turn the power back on from your electrical panel. The smart bulb should now be powered, but don’t expect it to start working just yet.
d. Follow the Manufacturer’s Instructions for Syncing and Setup:
- The manufacturer’s instructions will guide you on how to sync the smart bulb with your smartphone app. Typically, this involves putting the bulb into a pairing mode and connecting it to your Wi-Fi network.
e. Connect the Smart Bulb to Your Wi-Fi Network:
- Follow the app’s prompts to connect the smart bulb to your home Wi-Fi network. This step is essential for remote control and automation.
f. Customize Settings and Control Options in the App:
- Once the smart bulb is successfully connected, explore the app to customize settings, adjust brightness, set schedules, and explore any additional features your bulb may offer.
With the smart bulb installed and connected, you’re on your way to enjoying the convenience and versatility of smart lighting.
By following these installation steps, you’ll have successfully set up your smart light bulb. In the next sections of this article, we’ll cover troubleshooting tips for common issues and guide making the most of your smart lighting system, including integration with voice assistants and automation.
Get ready to transform your home into a smart, well-lit haven where you have complete control over your lighting preferences.
Step 6: Troubleshooting
Even with careful installation, you may encounter issues during the setup of your smart light bulb. Here are some common problems and their solutions:
a. Connection Problems:
- If your smart bulb isn’t connecting to the app or your Wi-Fi network, try resetting the bulb and going through the pairing process again. Ensure that you’re using the correct Wi-Fi credentials.
b. Inconsistent Performance:
- If your smart bulb is behaving unpredictably, check for firmware updates in the app. Manufacturers often release updates to improve stability and functionality.
c. Dimming or flickering:
- If you experience dimming or flickering, ensure that your smart bulb is compatible with the dimmer switch. Some smart bulbs may not work properly with traditional dimmers.
d. Compatibility Issues:
- If you’re integrating your smart bulb with voice assistants like Alexa or Google Assistant, make sure the devices are compatible and correctly linked in the respective apps.
e. Range Problems:
- If your smart bulb is out of range from your Wi-Fi router, consider installing a Wi-Fi range extender to improve connectivity.
Step 7: Tips for Using Smart Light Bulbs
Now that your smart light bulb is successfully installed and connected, let’s explore ways to make the most of this technology:
a. Integration with Voice Assistants:
- If you use voice assistants like Amazon Alexa or Google Assistant, connect them to your smart bulb. This allows you to control your lights using voice commands.
b. Scheduling and Automation:
- Take advantage of your smart bulb’s scheduling features. Set timers and routines to have your lights turn on or off at specific times, enhancing security and convenience.
c. Grouping and Control:
- If you have multiple smart bulbs, group them in the app. This allows you to control several bulbs at once, adjusting their brightness or colors simultaneously.
d. Energy Efficiency:
- Smart bulbs are energy-efficient. Use this feature to save on electricity bills by dimming lights when not needed or automating them to turn off when you leave a room.
Conclusion
Installing a smart light bulb is a simple process that can greatly enhance your home’s lighting capabilities. With the right tools, careful selection, and a clear understanding of the installation steps, you can enjoy the convenience and customization that smart lighting offers. Additionally, troubleshooting and advanced control options ensure that your experience is seamless and tailored to your preferences.
Embrace the future of home lighting and transform your living space into a well-lit, intelligent environment where you have complete control over your lighting preferences and an energy-efficient home.
In the next section of this article, we’ll delve into some advanced features and considerations when using smart light bulbs, as well as how to expand your smart lighting system. Let’s continue:
Step 8: Advanced Features and Considerations
Once your smart light bulb is up and running, you can explore advanced features that enhance your lighting experience.
a. Color and Temperature Adjustments:
- Many smart bulbs offer a wide range of color options, allowing you to create vibrant atmospheres for different occasions. Adjust the color temperature to warm or cool light as needed.
b. Geo-Fencing and Location-Based Control:
- Some smart bulb apps support geo-fencing, which means your lights can automatically turn on or off as you enter or leave a predefined area. This is perfect for energy savings and security.
c. Third-Party Integrations:
- Check if your smart bulb is compatible with other smart home devices, like smart thermostats or security cameras. Integrating your devices can streamline your home automation.
d. Firmware Updates:
- Regularly check for firmware updates in the app to ensure your smart bulb remains secure and up-to-date with the latest features.
e. Security Considerations:
- Secure your smart bulb by using a strong, unique password for the app and your Wi-Fi network. Keeping your firmware updated also helps protect against potential vulnerabilities.
Step 9: Expanding Your Smart Lighting System
As you become more comfortable with your initial smart light bulb, you might want to expand your smart lighting system. Here are some ways to do that:
a. Additional Bulbs:
- Purchase and install more smart bulbs in different rooms to enjoy the benefits of smart lighting throughout your home.
b. Smart Light Switches:
- Consider replacing your traditional light switches with smart switches. These can control multiple lights in a room and are often compatible with smart bulbs.
c. Smart Lighting Ecosystems:
- Explore broader smart lighting ecosystems offered by companies like Philips Hue, LIFX, or TP-Link. These systems allow you to connect various smart lighting products for a comprehensive home lighting experience.
d. Voice Control:
- Expand your voice-controlled lighting by adding more bulbs or integrating your entire lighting system with your preferred voice assistant.
By expanding your smart lighting system, you can create a fully connected and automated home lighting experience.
Conclusion
With your smart light bulb installed, configured, and customized, you’ve entered a world of lighting possibilities. From energy-efficient lighting to setting the mood for different occasions, smart light bulbs offer convenience, versatility, and personalization.
As you explore advanced features and expand your smart lighting system, you’ll discover new ways to make your home more intelligent, energy-efficient, and adaptable to your lifestyle. Embrace the future of lighting and take full control of your home’s ambiance with smart light bulbs.
Welcome to a brighter, smarter, and more connected home!
In the final section of this article, we’ll discuss maintenance and care for your smart light bulbs, as well as offer some additional tips to ensure a seamless experience:
Step 10: Maintenance and Care
Taking care of your smart light bulbs is essential to ensuring their longevity and optimal performance. Here are some maintenance tips:
a. Cleaning:
- Periodically clean the exterior of your smart bulbs using a soft, dry cloth. Avoid using abrasive or chemical cleaners, as they may damage the bulb’s surface.
b. Firmware Updates:
- Regularly check for and install firmware updates as provided by the manufacturer. Updates may include bug fixes and new features to enhance your smart bulb’s performance.
c. Resetting:
- If you encounter persistent issues with your smart bulb, follow the manufacturer’s instructions to perform a factory reset. This can often resolve software-related problems.
d. Compatibility Check:
- If you add new smart devices or change your home network setup, ensure that your smart bulb remains compatible and connected.
e. Energy Efficiency:
- Continue to use energy-saving settings, like dimming and scheduling, to reduce electricity consumption and extend the life of your bulb.
Additional Tips
Here are a few more tips to make the most of your smart light bulb installation:
a. Explore Third-Party Apps:
- Check if there are third-party apps available that offer additional features and control options for your smart bulb.
b. Share access:
- If multiple people in your household use the smart bulb, consider sharing access through the app so everyone can control the lighting.
c. Guest Access:
- Some apps allow you to provide temporary guest access for visitors, giving them limited control over the lights.
d. Experiment and enjoy:
- Smart light bulbs are versatile. Experiment with different lighting scenarios and enjoy the flexibility they offer. Create the perfect ambiance for any occasion.
Conclusion
Congratulations on successfully installing and setting up your smart light bulb! You’ve embarked on a journey of convenience, energy efficiency, and personalization in your home’s lighting.
By following maintenance tips and exploring additional features, you’ll ensure that your smart light bulb continues to enhance your living space for years to come. With these advanced features and care, your smart lighting system will remain a vital part of your smart home.
Welcome to the world of smart lighting, where you have the power to create the perfect lighting environment with just a tap on your smartphone. Enjoy your well-lit and intelligent living space to the fullest!
That concludes our comprehensive guide on installing and maintaining smart light bulbs. We’ve covered everything from selecting the right bulb to advanced features, expanding your system, and maintenance tips. With the knowledge and guidance provided in this article, you are well-prepared to make the most of your smart lighting system.
As you continue to explore the exciting world of home automation, remember that smart light bulbs are just the beginning. The world of smart technology offers endless possibilities for enhancing your lifestyle and making your home more convenient, efficient, and enjoyable.
Whether you’re setting the mood for a cozy evening, ensuring security while you’re away, or simply brightening up your day, smart light bulbs are a brilliant addition to any modern home. Enjoy the convenience, energy savings, and endless lighting possibilities that smart lighting provides.
Thank you for reading, and we wish you a well-lit and intelligent future in your smart home!


